Insulating a van not only helps with controlling the temperature, but also helps with sound while driving or sleeping. Our van conversion maintains the original passenger van inside walls and ceiling, so all our insulation goes in behind those. If you have a cargo van, or are replacing all the passenger walls/ceiling, this page probably won’t be that useful to you.
I opted for wool insulation from Havelock. It’s on the pricey side, but it has advantages. I’m convinced that there is no ‘best for all’ insulation; if you’re planning on living out of your van, you may want to opt for another alternative.

Walls
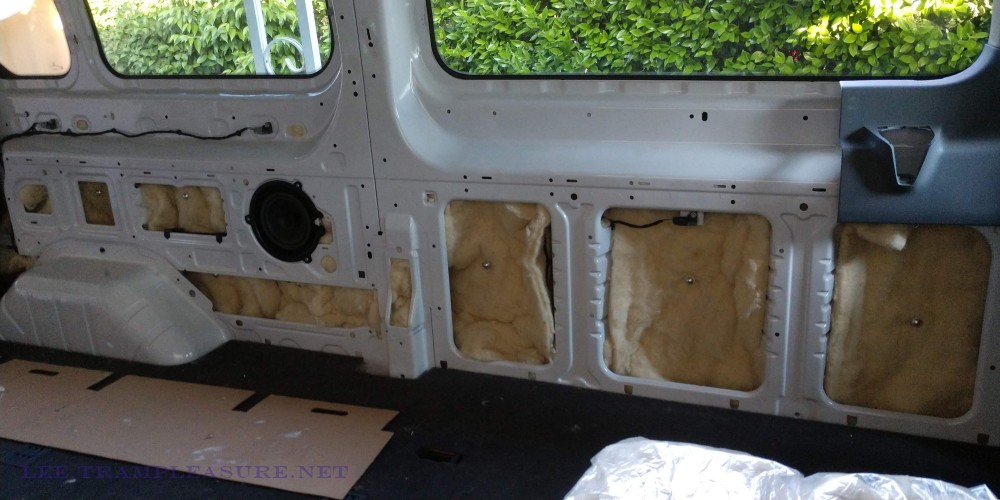
Unlike a house, vans undergo lots of vibrations; these vibrations will result in insulation sagging down to the bottom of walls. I added insulation pins with caps to prevent this sagging. Hopefully this will work; at some time soon I’ll open up the walls and add photos of the insulation.
Here’s a short video showing the insulation pins.
Here is a gallery showing the installation in the side walls.


Roof
The roof of the Transit van includes a large ventilation duct that brings air from the heat exchanger at the back of the van to the vent holes in the ceiling. Here’s a video showing this setup:
In order to fit my fan in, I needed to cut the front end of the air duct. It was plastic, so cut easily with an electric saw. I simply duct-taped the open end to seal it.
I didn’t get a lot of photos of the roof installation, but here’s three:
- The first shows some insulation I squeezed into the frame, and a plastic bag taped under the area where I will cut out for the fan (I got this tip from a video; keep the plastic lose so the saw blade doesn’t go through it, and the plastic will catch all the metal sawdust and keep it from falling into the carpet on the floor).
- The second photo shows the insulation pins with the fan installed.
- The third photo shows how I used a camera tripod to hold the ducting up against the roof while adjusting it to connect it to the roof with its fasteners.

Roof with some insulation and insulation pins. Plastic sheet is taped under the area where hole will be cut for fan. Insulation pins glued to ceiling and fan installed. Using a camera tripod to hold the ceiling up next to the fan. I used a camera tripod to hold the ducting in place when moving it before I could clip it in.


More video resources
- Chuck Cassady: If you want to live in your van, I’d highly recommend watching this video. Chuck goes into the science behind insulation, and gets you thinking about what’s best for you.
- DIYVan: Installing Thinsulate in the doors of a van.
- Brad and Nicole Bean: Tips for removing panels for insulation.
- Tim Rose: If you have a medium or high roof van, this video shows how one guy insulated his headliner above the front seats.
Discover more from Lee Trampleasure
Subscribe to get the latest posts sent to your email.